Muzata is a pioneer in the cable railing industry, and over the past few years, we have helped millions of families around the world build cable railing projects. We are committed to developing product designs that are easier to install.

You are the one, Cable Railing!
Cable railing is a modern, stylish, and safe railing design that offers excellent visibility and openness, making it a popular trend. More importantly, cable railings are a DIY-friendly solution.
Cable railings have experienced a surge in popularity in recent years, becoming the first choice for many homeowners looking to add a contemporary touch to their decks, staircases, balconies, and other spaces through new installations or renovations.
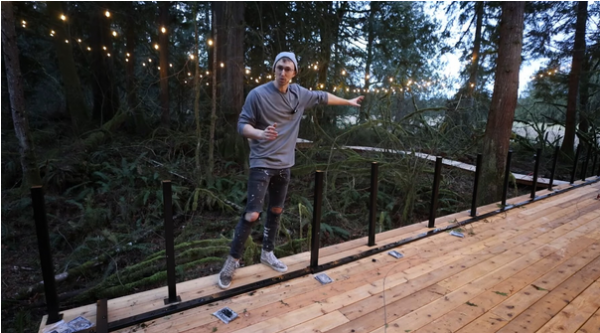
Next, please follow along with Muzata’s collaborating influencer Devon Loerop to learn how to complete a cable railing project, step by step.


How to Install a Cable Railing Project?
First, design and plan the space
This is the flat rendering and site photos that Devon Loerop sent to Muzata’s design team, annotated with his desired installation plan.

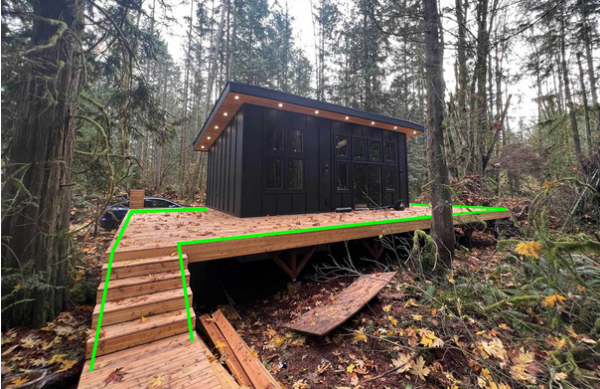
Based on these two pictures and the dimensions marked on them, Muzata can prepare everything. Here, it is important to mention the “One-stop Solution Design Service” provided by Muzata. From shopping, quoting, and customized plan design to shopping lists and detailed installation instructions, the whole process is hassle-free and at no extra cost.
Then start the installation
when the product package arrives, the installation work can begin. “At first, They do seem a little daunting, but once you get the hang of it, it’s pretty easy.”Devon Loerop said.
01 Lay out all the railings
In the first step, you can lay out all the railings along the deck to make sure the distance between each post is the same.
02 Install the first post
If your railing project includes corners, the first post can start with a corner post.
Step 1 Measure and mark the holes.
Step 2 Ensure that the holes in the post and the bracket are aligned.
Step 3 Pre-drill the holes and insert the leg screws.
Step 4 Tighten each screw to ensure that the post is perfectly level.
Step 5 Fit the footplate.
Step 6 Fasten the top bracket plate.

03 Installing the next post
Before installing the next post, place the handrail on top to get an accurate measurement of where the next post will go.
Step 1 Insert the connector into the end of the handrail.
Step 2 Measure and mark the holes for the next post.
Step 3 Fix the third post to complete a section of the system.

04 Installing the handrail
Step 1 Drill holes through the handrail and also through the handrail connector.
Step 2 Tighten the screws to connect the handrail to the posts.

05 Fitting the centre post
Step 1 Measure the total distance between the two posts.
Step 2 Install this post in the center of the two posts.
Step 3 Follow the same procedure and fix it to the bottom of the handrail.

06 Completing all the guardrail structures
That’s the first small section, now just repeat and continue down the deck.

07 Terminal and cable installation
Now that all the railings are in place, it’s time to install the cables that run between them.
Step 1 Cut the cable just a little longer than it needs to be to fit the whole runway.
Step 2 Fit the steel cable into the tensioner and secure it.
Step 3 Secure it to the post. Don’t tighten it.
Step 4 Once the tensioner is secured, fit the washers one at a time into the cable and pass the cable through all the posts.
Step 5 Loosen the tensioner completely and install the fixed end.
Step 6 Tighten the tensioner.
Step 7 Lay all the cables along the front run.
Once this is done, the entire cable railing project is complete.


Devon Loerop raves that Muzata’s Cable Railing is “The best DIY cable rail on the market”.Installing a cable railing system yourself is not difficult at all once you get the hang of it. In conclusion, installing a cable railing system may seem daunting at first for many homeowners. However, it’s important to understand that with the right approach and an understanding of key techniques, the installation process can be straightforward and entirely manageable for a DIY enthusiast.


Dive into the project with confidence, knowing that the beauty and satisfaction of completing this task yourself is just around the corner. Join us today and elevate your living space with Muzata!
Media Contact
Company Name: Muzata
Contact Person: Media Relations
Email: Send Email
Phone: 1-888-680-8850
Country: United States
Website: https://muzatarailing.com/